
Winnebago 2018 2108DS Micro Minnie Furnace Removal (Sail Switch Cleaning)


DISCLAIMER: I am not an RV repair tech, have no training in RV furnace maintenance. What I am sharing here is what I’ve learned from internet searches and from experience. I AM NOT RESPONSIBLE FOR YOUR SUCCESS FOR FAILURE. IF YOU ARE UNCERTAIN ABOUT THE FOLLOWING PROCESS, CALL YOUR WINNEBAGO DEALER OR YOUR FRIENDLY RV TECHNICIAN.
ALSO, GIVEN MODEL CHANGES FROM TIME TO TIME, I CAN’T GUARANTEE THAT WHAT YOU WILL FIND IN YOUR MICRO MINNIE IS THE SAME AS WHAT I DID.
Furnace Model Number: Atwood/Dometic AFSD20121
Symptom: Your furnace fan runs for 20 or thirty seconds and then shuts off without the furnace firing. There are several things that cause a furnace to fail, including low or no propane, a faulty thermostat or a faulty furnace circuit board, to name a few. But . . . .
My Hypothesis: A faulty sail switch.
In the 2108DS Micro Minnie, as with others in this Micro Minnie line, there is no outside furnace access. And given that the sail switch is on the end of the furnace that butts up against the outside wall, the furnace needs to be removed from the inside to access the sail switch.
STEP 1: Disconnect Power
Disconnect all 12volt and 120volt electricity from your camper. To be safe, I disconnected both positive and negative leads from my batteries and made sure my shore power was disconnected.
Step 2: Disconnect Propane
Turn the propane off at the tank. Even better, turn off the propane and disconnect the hoses from the tanks. After doing this, ignite one stove burner to bleed existing propane gas from the lines. The flame should go out on its own after a few seconds. Turn the burner off.
Step 3: Remove Outside Furnace Exhaust Fittings (Photos 1-7)
On the outside of the trailer remove the metal exhaust vent by removing the four square drive self tapping screws. The exhaust pipe is curved and will only fit back in one way. You might want to mark the top of the square exterior exhaust vent so you can easily put this back in at the end of the process. Then remove the rubber piece under the metal vent. This is held in with caulking and needs to be taken off as the end of fits in to the back of the furnace by friction. I used a flexible putty knife to remove this piece.
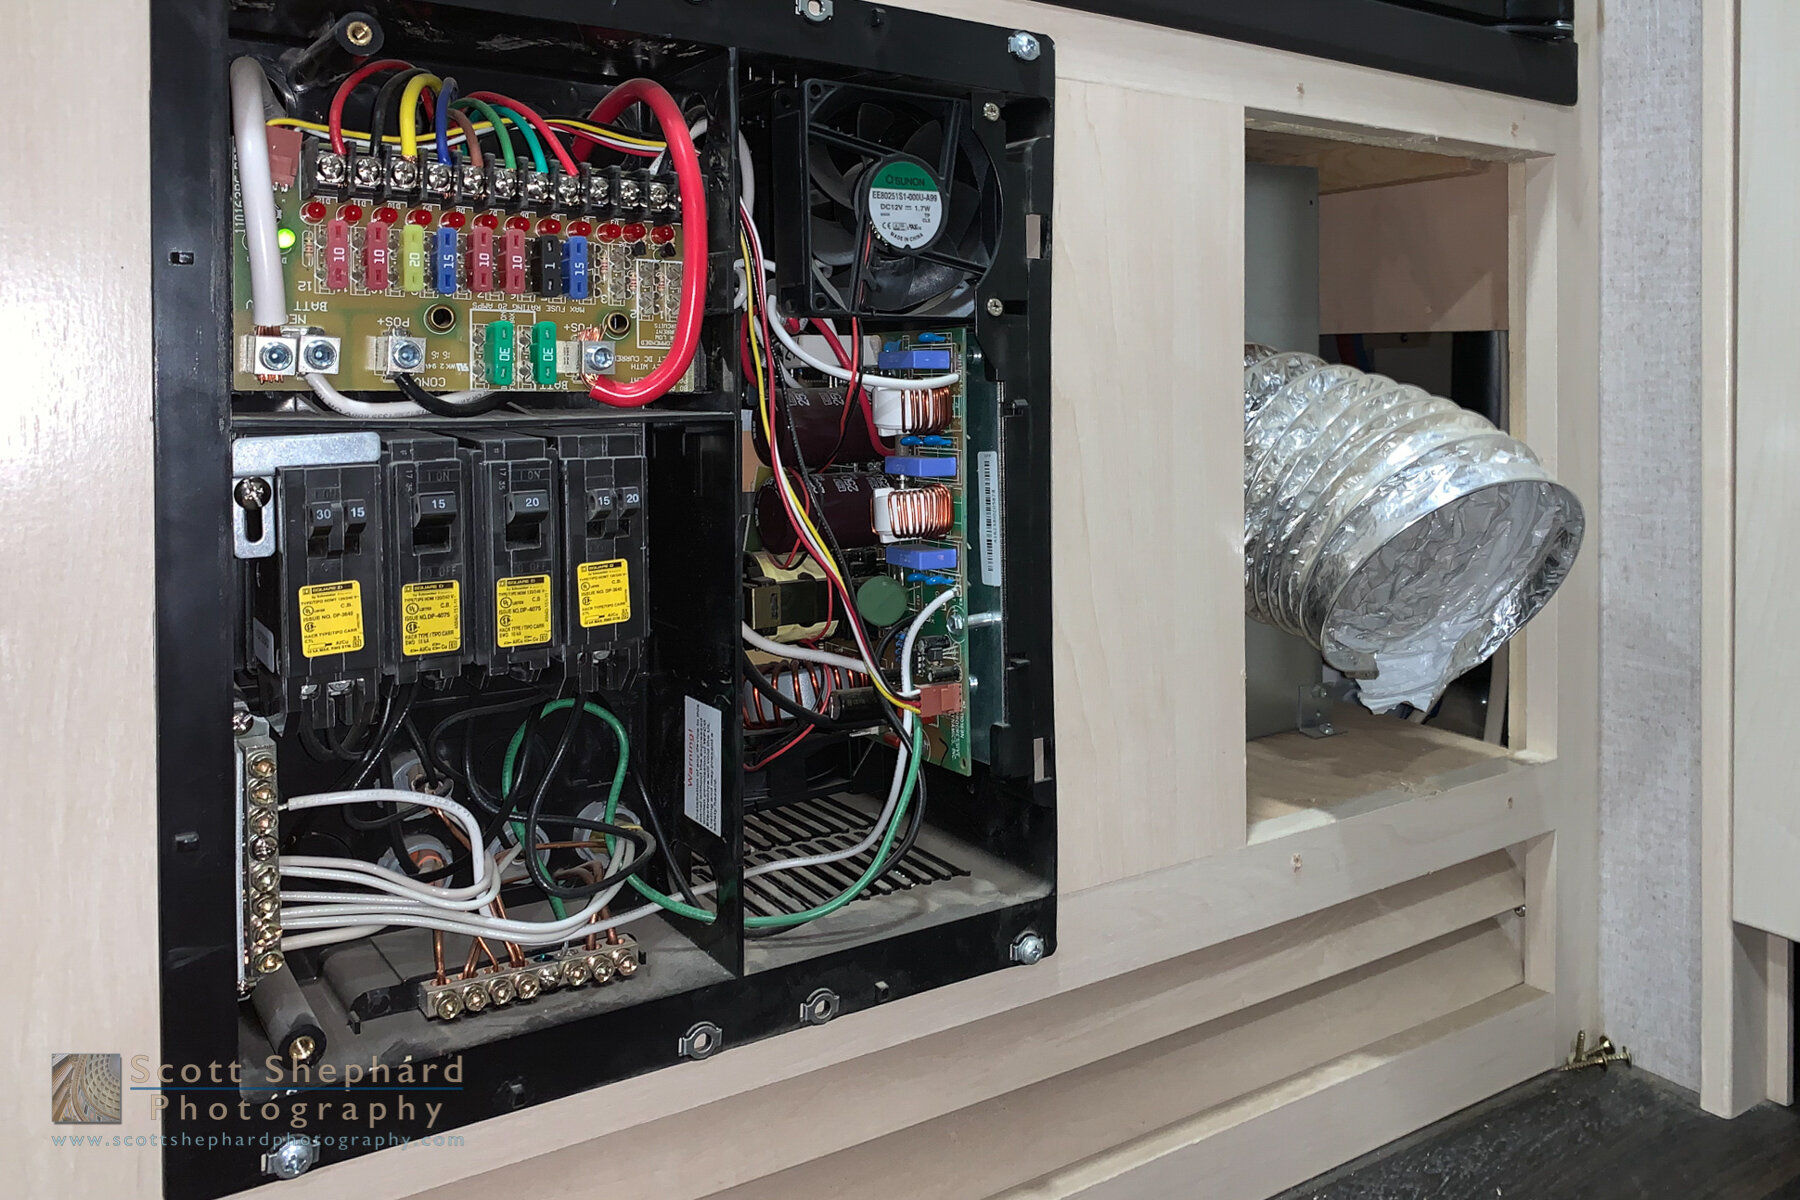
Step 4: Disconnect Flexible Furnace Ducting
Inside the camper remove the facing of the electrical panel and remove the plastic furnace grill next to it. (8) The primary flexible ducting fits onto the back of the furnace grill by friction. (9) Then remove the flexible ducting from the furnace body by turning the hose until the the small flange on the back of the fitting lines up with the slot on the furnace body. (10-13) Disconnect the smaller bathroom flexible ducting from the right side of the furnace body by first loosening the hose clamp. After pulling the hose off, remove the metal flange from the furnace body by rotating until the slots line up. (14-17) (You may be able to remove the ducting by rotating the flange without loosening the hose clamp. In my case there didn’t seem to be enough play for this and I didn’t want to damage the ducting.)
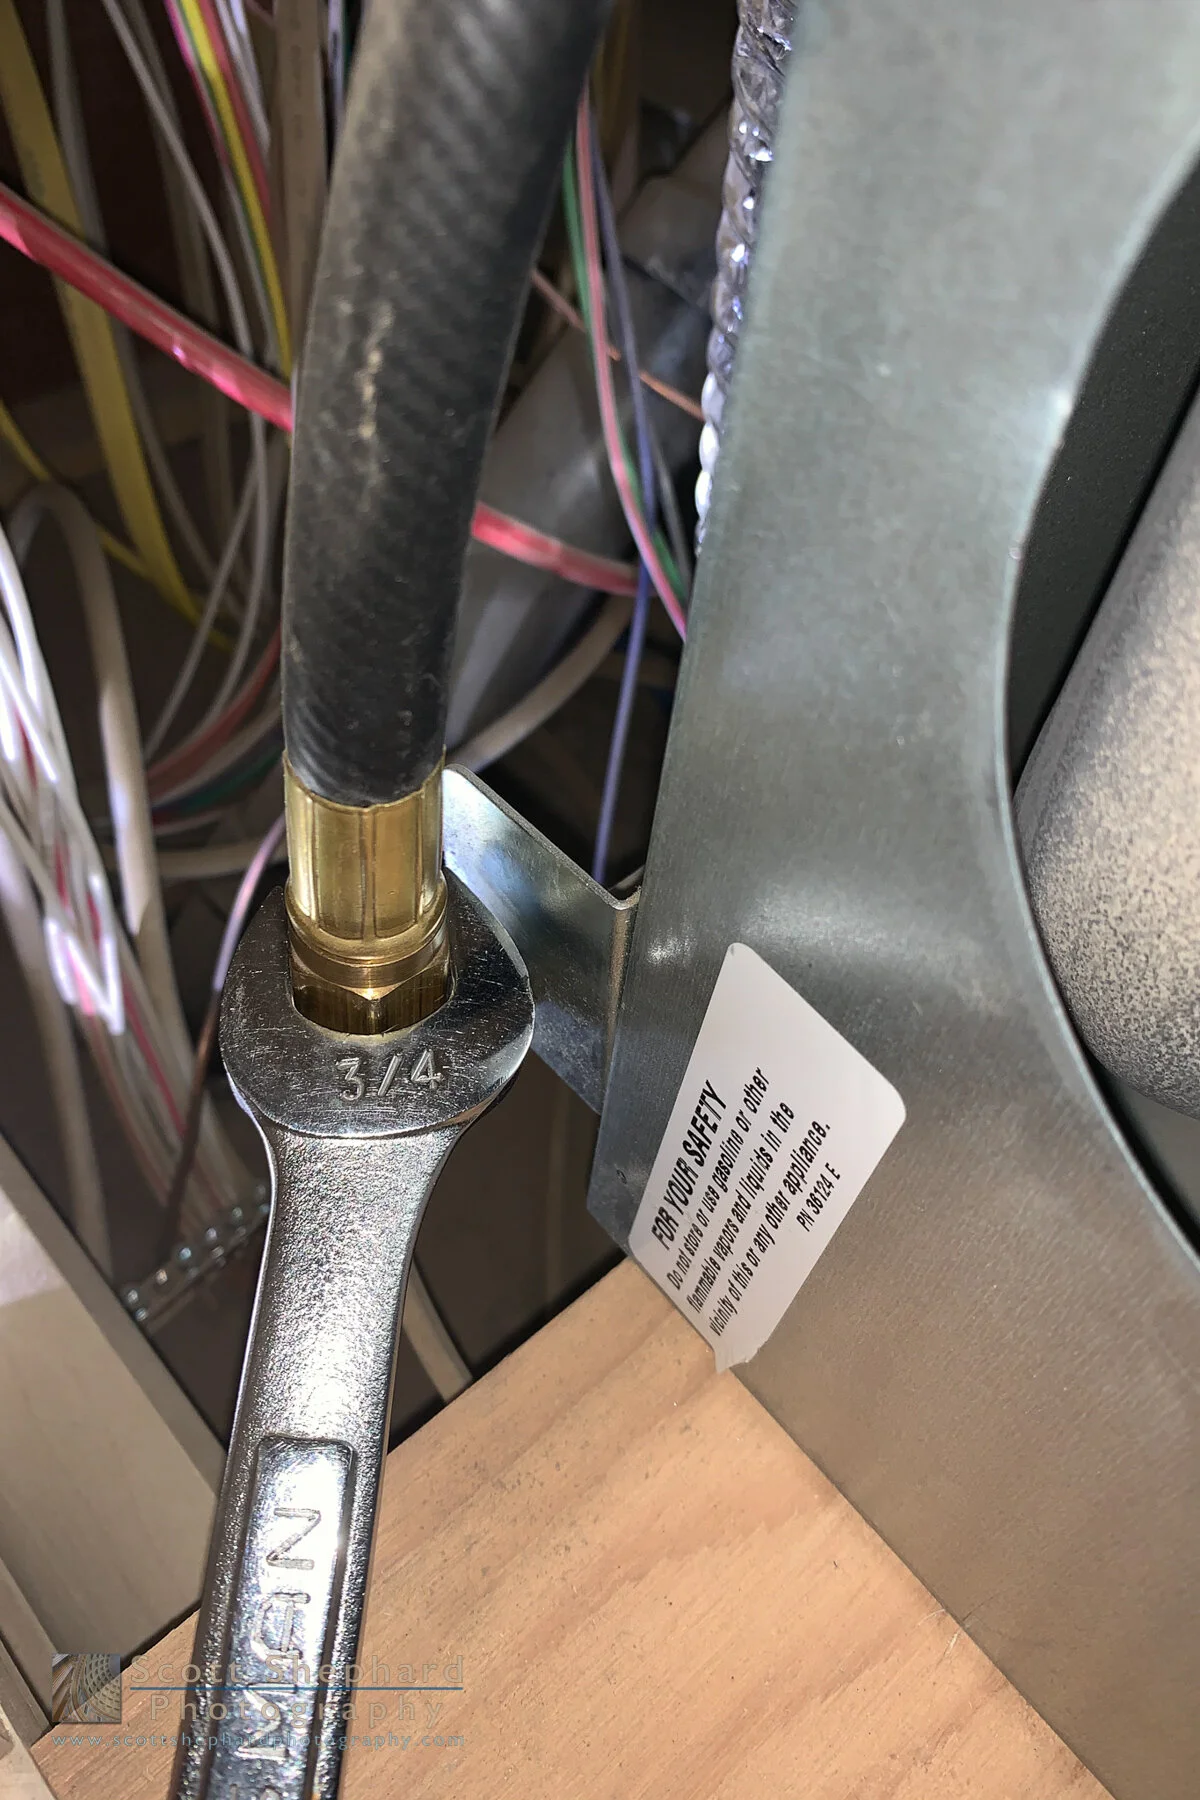
Step 5: Disconnect Gas Line (Photos 18 & 19)
The gas line is the black hose connected at the bottom left of the furnace front. It takes a 3/4” open ended wrench to do so.
Step 6: Remove Small Ducting From Left Top Side of Furnace
To do this you will probably have to remove the 4 screws that hold the electrical distribution/fuse box in place and then gently pull it out to create a gap. (21) There is some play in the wires leading to the electrical box but BE CAREFUL not to pull too hard. This flexible ducting is held on by the same kind of slotted flange that the main and bathroom hot air ducting is. Just rotate to remove. (22 & 23)
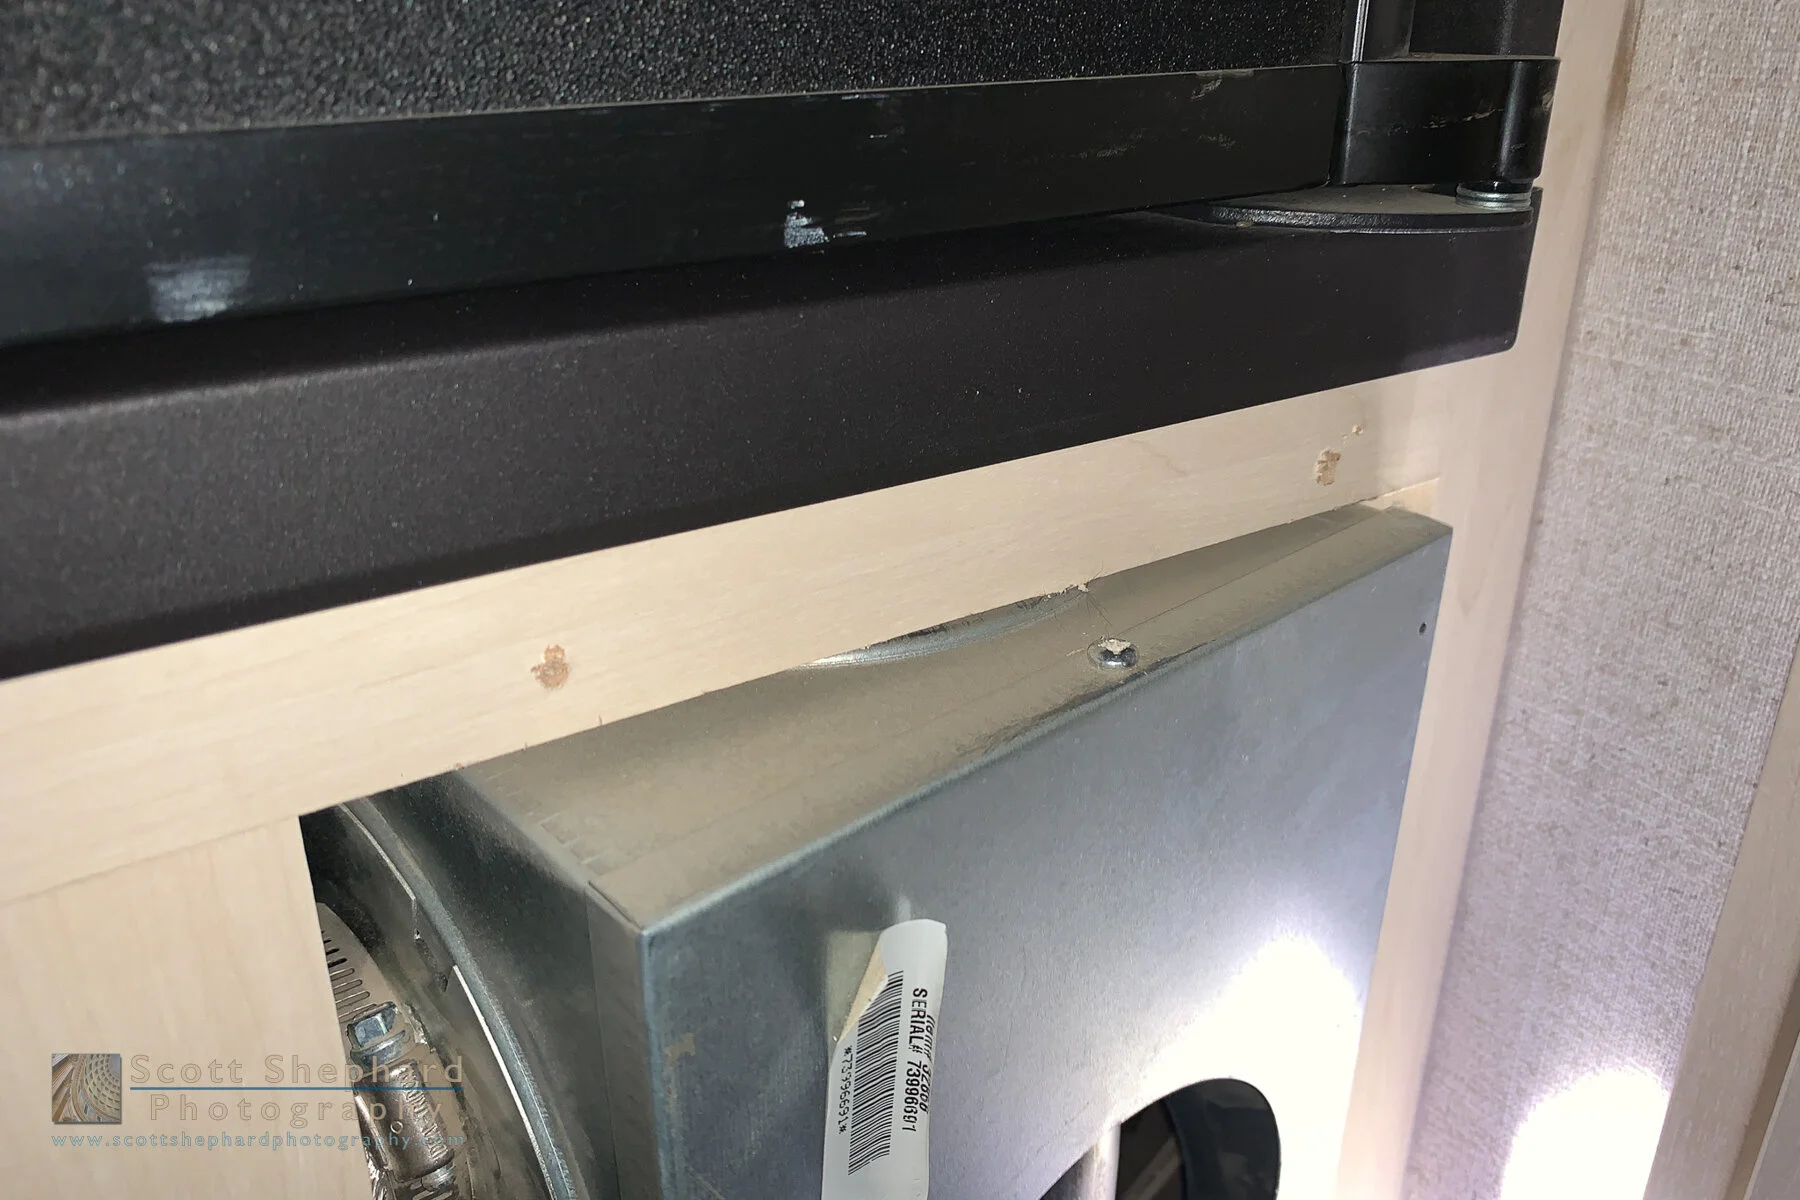
Step 7: Remove Furnace
There is bracket on the bottom right front of the furnace and only 1 screw holding the furnace in place. (24) (The black plastic flange you removed from the outside of the trailer is what secures the back of the furnace and it does so by friction. (4&5)) Remove this screw, which requires a square drive bit. Remove the bracket from the front of the furnace box using a 1/4” socket. (25 & 26) IMPORTANT: In my 2108DS the furnace is a very tight fit and you will likely need to gouge the cabinet facing to remove the furnace. (27 & 28) If you feel resistance, it is likely either a screw on the top of the furnace or on the bottom contacting the cabinet facing. (29-31) I used a Dremmel tool to make a shallow slot to make removal easier. This gouging, incidentally, is covered by the furnace grill.
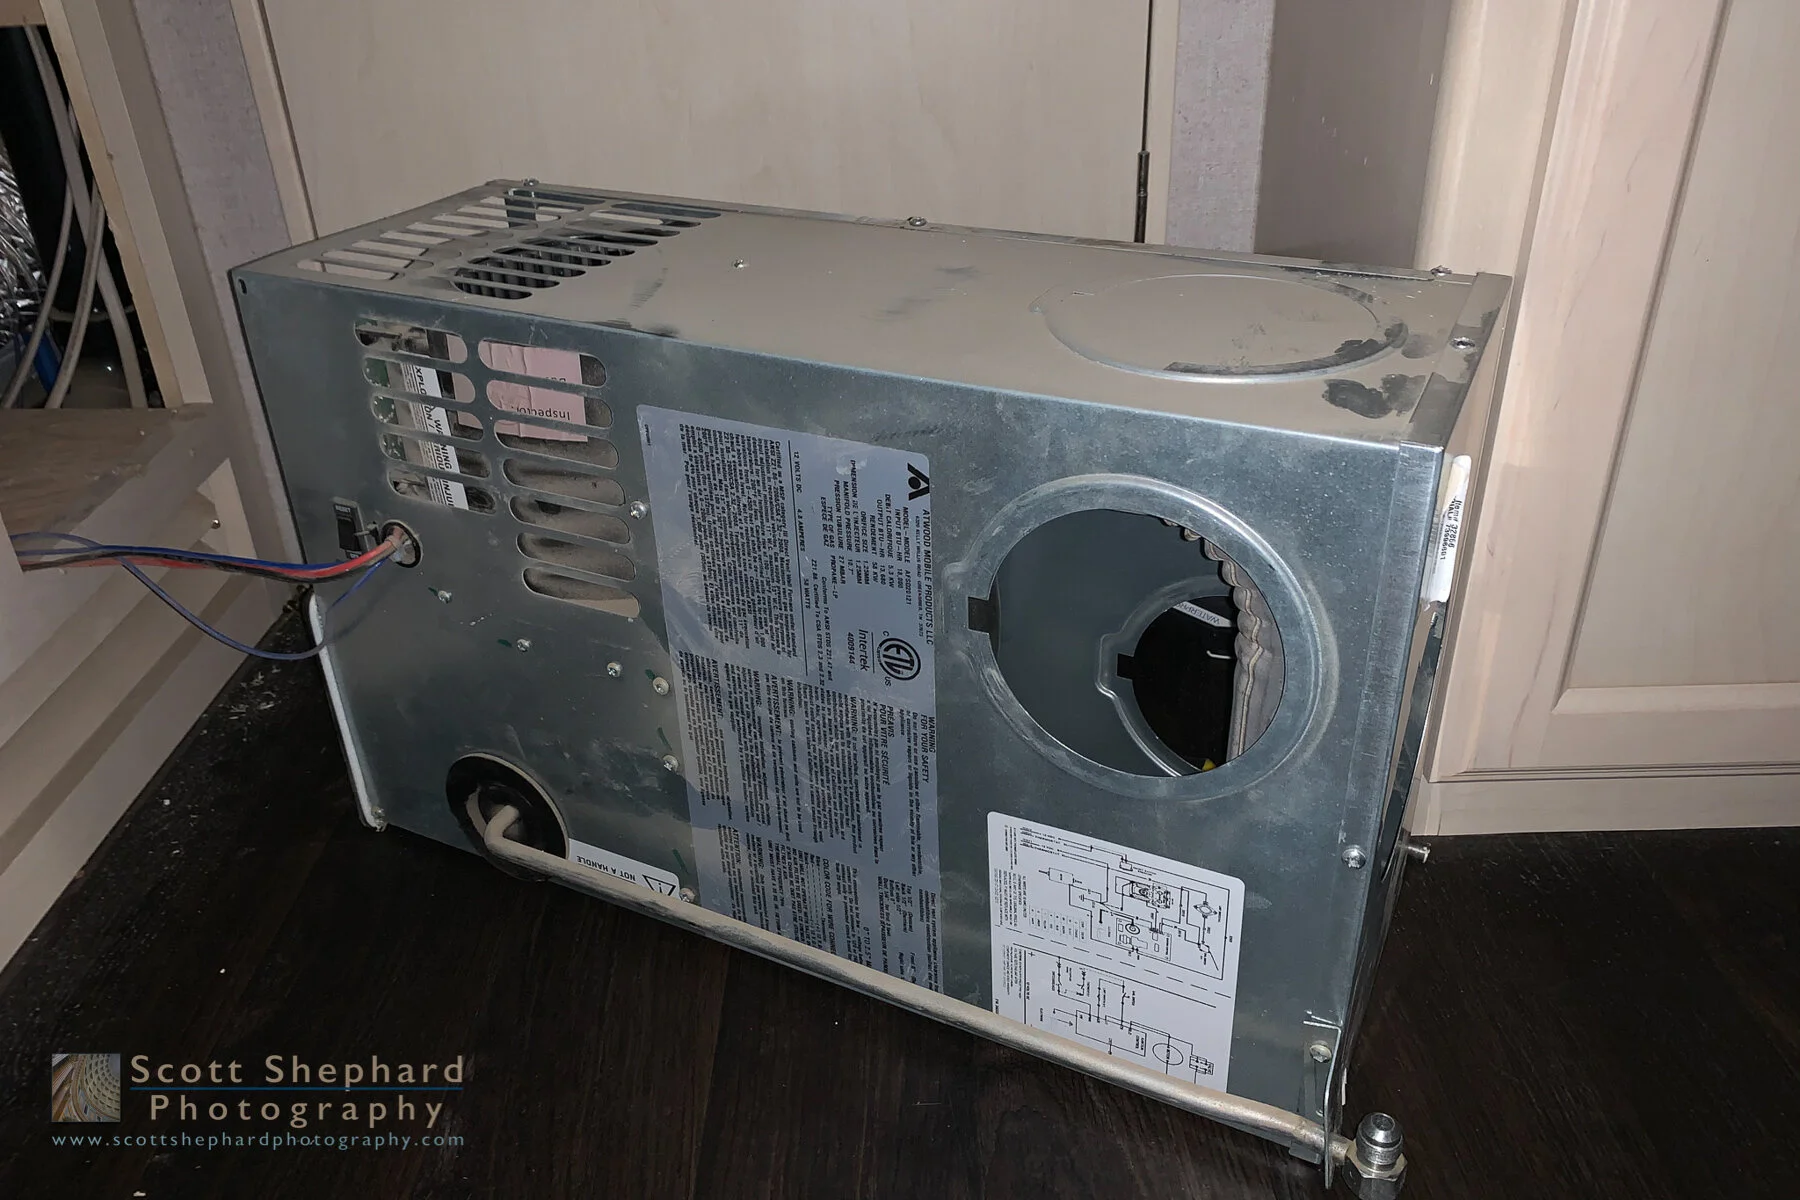
The furnace is wired at the back (34 & 35) but there is enough wire to allow it to be taken out of the cabinet. BE GENTLE and DELIBERATE in doing this so you don’t do damage to the wiring.
Step 8: Remove Sail Switch
As you look at the back of the furnace, the circuit board is at the top and the sail switch is towards the bottom left. It is wired with two blue wires. Remove both wires by siding them off of the sail switch terminals. Before removing MARK at least 1 wire and its corresponding terminal so you can get them back in their original locations. The sail switch is held in by one screw. Once you have removed the screw, you should be able to pull the sail switch mechanism out. BE VERY CAREFUL DOING THIS AS THE SAIL SWITCH APPEARS TO BE A FAIRLY DELICATE.
Step 9: Clean Sail Switch (36-40)
You have to look closely at second to last photo (39) to see what was causing my furnace to fail to ignite: it was a small clump of fuzz. The last photo (40) shows a clean switch and the culprit below it. It is conceivable that you have a faulty sail switch, in which case you need to install a new one. They are cheap and readily available and it might be a good idea to have a backup.
Step 10: Put Everything Back Together
If you didn’t find an obstruction in the sail switch, then none of this would have helped. Sorry. In my case, I’ve had the same problem twice with my furnace and both times cleaning the sail switch fixed the problem.
A few observations:
1) Besides the furnace gas line, there is a similar line that runs to the refrigerator. It is at the back of the furnace/electrical enclosure and needs to be held up above the back of the furnace when you put the furnace back in. If you don’t do this, you won’t be able to get the furnace all of the way in.
2) As far as I could tell, there was no teflon thread tape on the gas line connection. What little research I did suggested none was needed and might even be counterproductive. You may know better.
3 ) I did not have any of the kind of black sealant that held the black plastic/rubber flange on to the outside of the camper. I just relied on what was originally there, which seemed sticky enough. Later, I used transparent silicone sealant around the metal exhaust flange to prevent water infiltration.
4) The cause of the problem? Because it doesn’t take much to clog a sail switch, it is possible that pet hair and other fibers may have made their way into the furnace. The air intake for the furnace is the louvered panel just below the access to the furnace and the electrical cabinet. (See photo 21) It is possible that some kind of filter in this area could help solve the problem BUT given that the amount and speed of air flow over the “sail” of the sail switch is what triggers the ignition mechanism, too much filtering could render the furnace inoperable. It’s time for some experimentation.